

Table of Contents
- Why Dryer Vent Maintenance Matters More Than You Think
- The Real Risks of Neglected Dryer Vents
- What Happens Inside Your Dryer Vent System
- Your Complete DIY Dryer Vent Maintenance Checklist
- Monthly Inspection and Visual Assessment Steps
- Quarterly Lint Trap and Ductwork Cleaning
- Seasonal Deep Cleaning and Professional Inspection Schedule
- Warning Signs That Your Vent Needs Professional Help
- When DIY Maintenance Falls Short: Professional Solutions
- How We Help Dallas Homeowners Stay Safe and Efficient
- Your Custom Dryer Vent Maintenance Plan
- Frequently Asked Questions (FAQ)
Why Dryer Vent Maintenance Matters More Than You Think
Your dryer vent does one essential job: remove hot, moist air and lint from your dryer to the outside of your home. When that system works properly, your clothes dry faster, your dryer runs more efficiently, and your home stays safer. Most Dallas homeowners don’t think about their dryer vents until something goes wrong, but a little routine attention now prevents expensive repairs and serious hazards later.
We’ve seen firsthand how neglected dryer vents create problems that compound quickly. A vent that was clear three months ago can become partially blocked within weeks, depending on fabric type and dryer usage. Regular maintenance catches buildup before it becomes dangerous, keeps your dryer running at peak efficiency, and gives you peace of mind knowing your family is safe.
The good news is that basic dryer vent maintenance doesn’t require special tools or technical expertise. You can handle monthly and quarterly checks yourself, and knowing when to call a professional protects you from the issues that DIY attempts can miss.
The Real Risks of Neglected Dryer Vents
A clogged or restricted dryer vent creates multiple risks that go beyond inconvenience. The most serious is fire. Lint is highly flammable, and when it accumulates inside your vent system, heat from the dryer can ignite it. The U.S. Fire Administration reports that failure to clean dryer vents is a leading cause of residential dryer fires. We take this seriously because these fires are preventable through proper maintenance.
Beyond fire risk, a blocked vent forces your dryer to work harder and longer to dry each load. This wears out components faster, shortens the lifespan of your unit, and drives up your energy costs. You’ll notice clothes taking progressively longer to dry, even on high heat, which is a clear signal that airflow restriction has developed.
Moisture trapped in a clogged vent can also promote mold growth inside your ductwork, and that mold spores eventually enter your home. Families with respiratory sensitivities or allergies feel this impact most acutely. Read more about signs of a blocked vent to learn what to watch for.
What Happens Inside Your Dryer Vent System
Understanding your dryer vent’s anatomy helps you maintain it properly. The lint trap inside your dryer catches larger fibers, but not all lint. Fine lint particles escape through the ductwork that runs from your dryer to the outside wall or roof. That ductwork is typically flexible aluminum or rigid metal, sometimes with multiple bends depending on your home’s layout.
As air moves through the vent, friction causes lint to stick to the interior walls, especially in bends or sections where airflow slows. Over time, these deposits build up like a narrowing pipe. Temperature variations across your vent line, combined with moisture in the exhaust air, create an environment where lint adheres more stubbornly, especially during humid Dallas summers.
The exterior vent hood or damper also plays a role. Lint can accumulate at the damper flap, preventing it from opening fully, or debris can gather just inside the hood opening. Wind-driven rain and birds sometimes contribute to blockages from the outside. A complete picture of what’s happening inside your vent system shows why routine inspection at multiple points is essential.
Your Complete DIY Dryer Vent Maintenance Checklist
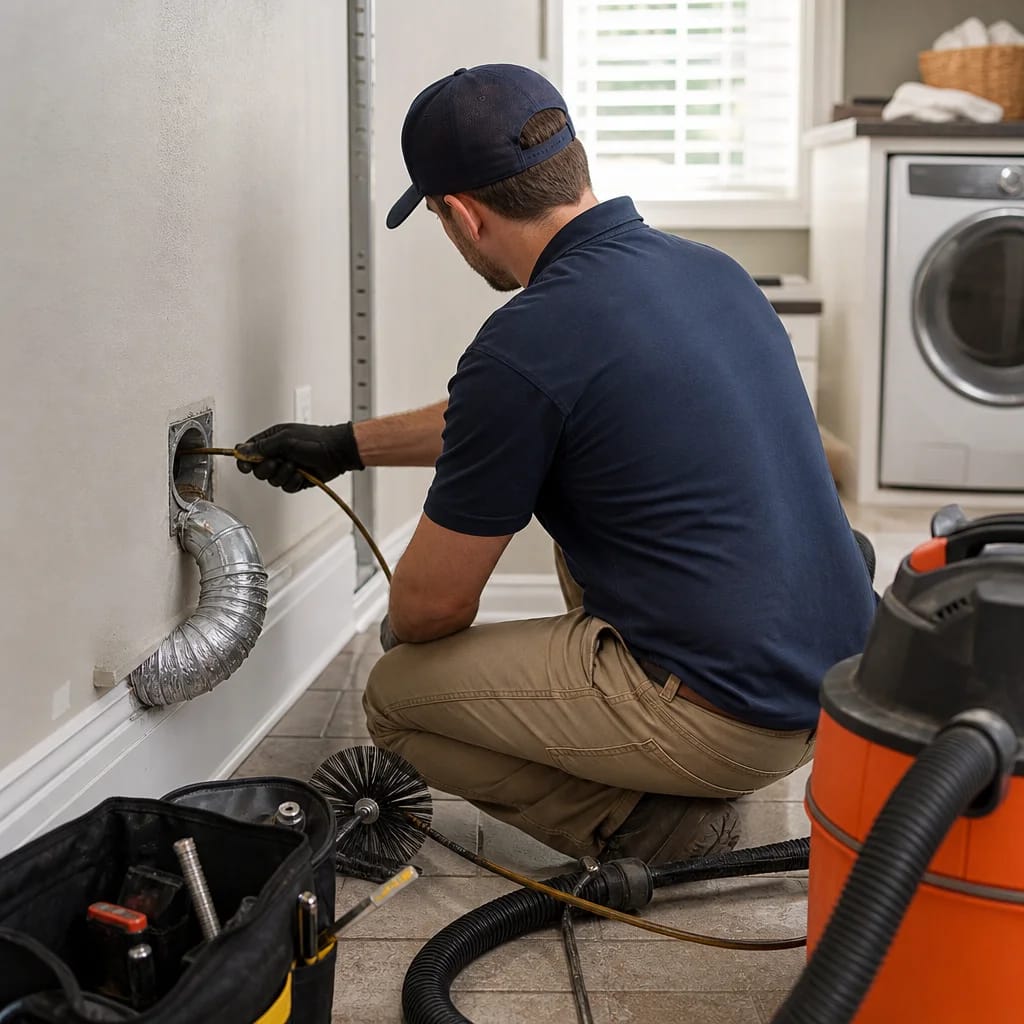
Effective dryer vent maintenance follows a schedule: monthly inspections, quarterly cleanings, and seasonal deep cleaning paired with professional assessment. This approach keeps your vent clear, catches problems early, and aligns with manufacturer recommendations for most residential dryers.
Here’s what you’ll need for DIY maintenance:
- Flashlight or headlamp
- Lint brush or soft wire brush
- Vacuum with hose attachment
- Dryer vent cleaning kit (brush and rods) from a hardware store, around 20-40 dollars
- Tall ladder (for roof or high wall vents)
- Gloves and dust mask
Set phone reminders on the first day of each month for your inspection, and mark your calendar for quarterly deeper cleaning. Keeping this schedule prevents the kind of gradual buildup that becomes hard to remove later.
Monthly Inspection and Visual Assessment Steps
Start by unplugging your dryer or turning off its power at the breaker. Safety comes first, and you never want the dryer running while you’re working on its vent system.
Check your lint trap first. Remove it and examine the screen. If you see a thick layer of residue that doesn’t brush away easily, wash the trap with warm soapy water and a soft brush, then air dry it. A clogged lint trap reduces airflow significantly and forces the dryer to overheat.
Next, look behind or underneath your dryer at where the ductwork connects. Use your flashlight to peer into the vent opening. You should see relatively smooth metal interior. If you see lint accumulated inside, note it for your quarterly cleaning. Check that the ductwork connection is snug and hasn’t separated.
Move to the exterior vent opening on your home’s wall or roof. Look at the hood damper and the area around it. Is the damper opening freely when the dryer runs? Is lint visible around the edges? Bird nests or debris blocking the opening? Take a photo on your phone if something looks off. Document any changes from month to month, and you’ll spot trends.
Your action this month: complete the full inspection and note any areas where lint is visible.
Quarterly Lint Trap and Ductwork Cleaning
Every three months, perform a more thorough cleaning. Unplug the dryer and pull it away from the wall to access the rear connections comfortably.
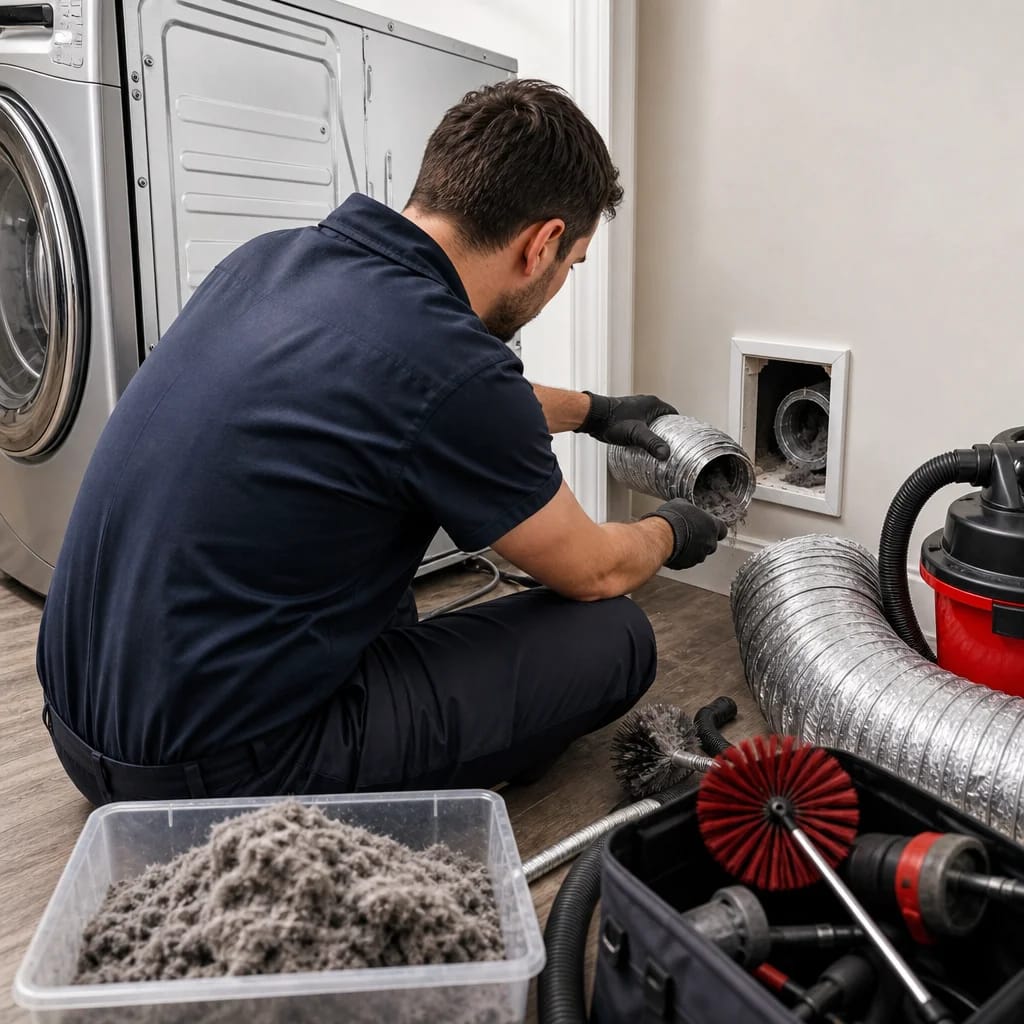
Remove the ductwork by loosening the clamp that secures it to the dryer outlet. Flexible ducts come apart easily; rigid ducts may require removing fasteners. With the ductwork detached, use your handheld brush to scrub the inside of the section closest to the dryer, then push sections of the brush rod (from your cleaning kit) through the duct while rotating it. This physically dislodges lint that’s adhered to the interior walls.
Work your way toward the exterior, either through a straight vent or by navigating bends. This is where patience matters. Rush this step, and you’ll only clear a portion of the buildup. Slide the brush rod back and forth several times through each section, rotating as you go.
Once you’ve brushed the interior, use your vacuum hose to capture loosened lint. Open a window or door near the exterior exit so lint doesn’t accumulate in your home. Vacuum the ductwork from both ends if possible.
Reattach the ductwork securely, making sure all clamps are tight. Then vacuum your dryer’s lint trap area and the opening where the duct was connected. Run the dryer for five minutes to clear any remaining lint from the system.
Your action this quarter: complete full duct brushing and reattach everything securely.
Seasonal Deep Cleaning and Professional Inspection Schedule
Spring and fall are ideal times for seasonal deep cleaning and professional inspection. We recommend having a professional inspect your dryer vent system annually, particularly if your laundry usage is high or your home has a long vent run with multiple bends.
For your seasonal DIY deep cleaning, repeat the quarterly steps but add a few extras. Check the exterior damper mechanism carefully. If it sticks or doesn’t fully open, apply a bit of WD-40 or silicone lubricant to help it move freely. Make sure no debris is packed around the hood opening, and clean the area thoroughly.
If your vent has been in service for more than five years without professional attention, or if you’ve never had it professionally inspected, schedule that appointment during spring or fall. Professional technicians have equipment like video inspection cameras that can identify blockages deep in the line or damage to ductwork that you can’t see from a visual inspection. They also have industrial-grade vacuums and auger-style brushes that clear buildup more completely than DIY tools.
Your action this season: schedule a professional inspection and complete your deep cleaning before the appointment.
Warning Signs That Your Vent Needs Professional Help
Certain signals indicate your dryer vent needs professional attention before a DIY approach can handle it. If your dryer is taking twice as long as it used to for a full cycle, or if clothes are still damp after a normal dry time, significant restriction exists. You’ve likely done what you can with basic maintenance, and professional cleaning is needed.
A burning smell when the dryer runs is a serious warning. This suggests lint may be overheating inside the system or accumulating near heat sources. Stop using the dryer and call a professional immediately. Similarly, if the exterior vent hood damper isn’t opening at all despite the dryer running, or if you see lint escaping around the dryer edges during operation, a blockage is blocking normal airflow.
Feel the exterior vent opening with your hand while the dryer runs on its air-only cycle (no heat). You should feel strong, consistent air exiting. Weak airflow or no airflow means the blockage is severe. Discover more details about signs of a blocked vent to help you recognize these issues.
Visible moisture around the dryer or a musty smell near it suggests that humid air isn’t venting properly. This can lead to mold issues that require professional remediation along with vent cleaning.
When DIY Maintenance Falls Short: Professional Solutions
DIY maintenance handles routine lint removal and keeps your system clear for normal operation. But certain situations demand professional equipment and expertise. Dryer vents with excessive bends, multiple elbows, or long runs of 25 feet or more are difficult to clean thoroughly with handheld tools. Blockages deep inside rigid ductwork may be inaccessible without the right equipment.
We use industrial dryer vent cleaning equipment, including high-powered vacuums and motorized brush augers, that clear blockages completely. We can also video-inspect your entire vent line to spot damage, improper connections, or areas prone to future blockage. For Dallas homes, common issues include birds nesting in roof vents and lint accumulating where flexible duct wasn’t properly supported and sagged inside the wall.
If your dryer vent runs through your attic or crawlspace, professional inspection catches moisture and heat damage to surrounding materials that you might not notice during a quick visual check. We also verify that your exterior damper is functioning correctly and that the hood opening is clear.
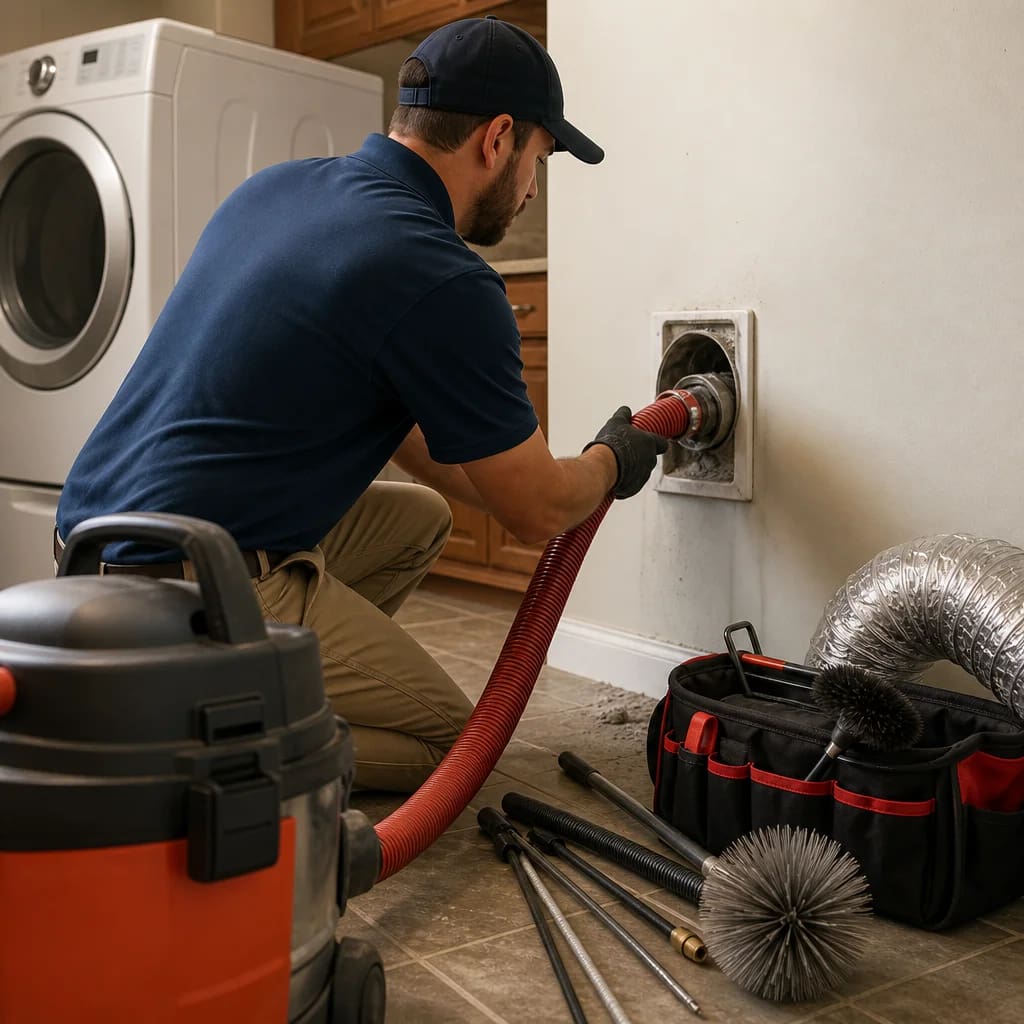
Some blockages are caused by crushed or kinked ductwork, which brushing won’t fix. We identify these issues and recommend replacement of the damaged section, restoring proper airflow permanently.
How We Help Dallas Homeowners Stay Safe and Efficient
Our dryer vent cleaning service removes built-up lint, debris, and blockages that your home’s safety and efficiency depend on. We inspect the entire system from connection to exterior exit, identify problem areas, and recommend maintenance schedules tailored to your home’s layout and usage patterns.
We understand Dallas’s climate, including humidity levels that make lint adhere more stubbornly to ductwork, and we know common vent configurations in area homes. Our technicians carry the right equipment to handle residential dryer vents safely and thoroughly, and we’re available on a schedule that works for you, including 24/7 emergency service if you need urgent attention.
Beyond dryer vents, we provide comprehensive air duct cleaning, repair, sanitization, and chimney maintenance. If you’re concerned about indoor air quality or efficiency across your home’s systems, we can assess everything and create a maintenance plan that keeps your family safe and comfortable.
Your Custom Dryer Vent Maintenance Plan
Start today with your monthly inspection and visual assessment. Mark your calendar for quarterly cleaning, and schedule a professional inspection this spring or fall. If you’ve never had your dryer vent professionally cleaned, or if it’s been longer than a year since the last service, now is the time.
Contact us to book a dryer vent inspection and cleaning. We’ll assess your vent system, clean out any blockages, verify that all connections are secure, and give you specific maintenance recommendations based on your home’s setup. Our goal is to help you maintain a safe, efficient dryer system and catch problems before they become costly or dangerous.
Your family’s safety and your home’s efficiency start with the systems you can’t always see. We’re here to keep yours working properly.
Frequently Asked Questions (FAQ)
How often should we clean our dryer vent to prevent fires?
We recommend inspecting your dryer vent monthly and performing a thorough cleaning at least quarterly, though Dallas homes in high-humidity areas may need more frequent attention. If you notice reduced drying efficiency or lint buildup around the vent opening, that’s your signal to clean it right away. We also suggest scheduling a professional inspection seasonally to catch blockages or damage that DIY maintenance might miss.
What are the warning signs that we need professional dryer vent cleaning instead of doing it ourselves?
We’ve found that visible mold growth, pest damage to ductwork, disconnected or damaged venting sections, and vents that run more than 25 feet all signal when professional equipment and expertise become necessary. If you’ve already attempted DIY cleaning but still experience slow drying times or burning smells, the blockage is likely beyond the accessible portions of your system. That’s when we bring in our specialized tools and training to safely restore your vent to full function.
Can we really reduce energy costs by maintaining our dryer vent properly?
Absolutely. We see homeowners cut their drying time and energy consumption significantly once their vents are clean and unrestricted, since your dryer doesn’t have to work twice as hard to push air through lint buildup. A properly maintained vent also extends your dryer’s lifespan and reduces wear on internal components. Regular maintenance is one of the most cost-effective steps Dallas homeowners can take for both safety and efficiency.